02-03 March 2013
Saturday 2 nd March Attendance: 1 It's been a month since Jason & Phil completed the fitting of the 2” pipework for the Vacuum brake system on D8233, now that the pipework was in place Jason could see a few areas that could do with some improvement, so today he set about going over some of the work that was done before and making it better, some of the things that needed improvement was the correct trimming of pipe threads so as not to show an undue threads showing, also there were some clearance issues on both the front buffer beam pipe and the stand pipe in the nose end, correcting these minor issues would be the main focus of the work this weekend. Jason Began in the support coach by putting some car batteries on charge? These had been bought over by Chris Baily and when wired up in series can be used to test small to medium auxiliary electric motors such as Traction motor blowers, exhausters and alike, these car batteries were in need of a top up charge to get them ready for some motor tests that are planned for in the coming weeks, two batteries were on the work bench already charged so Jason took them down to the workshop container where the rest of the batteries are stored and bought some more up to the coach and set the charger going, next he collected up the tools he would need to do the work in hand, filled up the hand trolley and went around to the loco. At the loco Jason soon removed the buffer beam pipe first he unscrewed the down pipe section and then he tackled the pipe that passes through the buffer beam into the three way elbow behind, this was quite tight to undue thanks to a raised shoulder on the end of the elbow that meets with the hole in the buffer bear, this shoulder was binding on the hole edge making it very tight to move, so with a combination of some large jimmy poles and the big stilsons Jason was able to remove the pipe, next he went into the nose end and unbolted the Deadmans Vacuum dump valve that sits atop the stand pipe, with that gone he could then unscrew the whole unit and remove it, with the pipe section that required adjustment removed Jason loaded up the trolley again and headed off down to the work shop container. At the container, Jason set up the Pipe vice on the work bench and clamped the down pipe into it, then he used some reference photographs he had taken to mark where he needed to trim the excessive threads back to, and using the electric sabre saw some chopped off the unwanted threads, he then cleaned up the threaded end he had just cut with the angle grinder and then the 2” BSP die nut and once that was done he moved onto the through pipe, the reason this needed adjustment was that it was sitting proud out of the front of the buffer beam and needed to be trimmed back so that when it was screwed in it would be flush, the same method of trimming was used and once that was done Jason then used the angle grinder to grind off the obtrusive shoulder on the end of the right angle elbow, one that was done the next task was to reduce the threads on the stand pipe so that it would improve the clearance between the top of the deadmans valve and the tail marker light bowl, this section is made up of 4 pieces, the 2” isolating cock at the bottom, a short double ended pipe, a threaded socket collar and the flange mounting for the deadmans valve that has male thread on it, all the threads were cut back as much as Jason dared as there was not much to work with, he then tightened the section down using the liquid thread sealant instead of the PTFE tape to seal the joints and using a section of bars managed to tighten the joints down a lot more than before and when checking the overall measurement found that he had saved around a centimetre in height. After some lunch Jason went around to the loco with the modified pipes and began refitting them, starting with the pipe that passes through the buffer beam, this seemed to go in a little easier and a lot deeper thanks to the ground off shoulder and trimmed back threads, however when tightening into position it was found that the elbow was now fouling the buffer beam, so Jason had to turn it back slightly and grind off a little bit more than anticipated, once that had been secured the down pipe was fitted and this had to line up with the mounting clamp on the buffer beam, the clamp had been ready to fit last time around but Jason had run out of time to fit it? But when he tried he found that the bolts were a tad too long and had to go back to the coach to dig out two shorter bolts, clean them up and bring them round to the loco to fit, with the buffer beam pipe now secured Jason moved into the nose end to re-fit the stand pipe, but had found that in tightening up the buffer beam pipe it had pulled the standpipe mounting forward a bit and now the 2” Isolating cock would not pass by the mounting seat for the lower marker light, so to get the clearance needed Jason had to dismantle part of the valve to remove the large nut that sticks out the back and falls foul, the back nuts on the floor had also worked a little loose so they needed to be nipped up, Next Jason used the sabre saw to trim down the threads on top of the stand pipe but the cut was not even and when the valve was test fitted it was well out of alignment when fully tightened so he had to leave the fitting f the stand pipe till tomorrow. To finish today off Jason went and fetched the paint, the vacuum pipe work is nearly all in green primer and needs to be undercoated next before it can be glossed, so Jason got the undercoat and painted up the buffer beam pipe areas at both ends of the loco, then he went into the cab and painted the stand pipe for the train brake valves, but time was getting on by then and he had to collect up the tools and return to the coach, as some more of the batteries had now charged he did another swap over taking three charged batteries down and bringing four batteries back, that then ended the day's work. Sunday 3 rd March Attendance: 2 As he had applied the undecoat paint to the buffer beam pipes the day before they would now be dry and ready for gloss painting so Jason got together the painting gear and when around to the loco, first he applied the gloss red to the area of the buffer beam behind the pipes, both the front and rear buffer beam sections were painted, around 11:30am Phil arrived and he and Jason set about refitting the stand pipe valves, as before this proved to be a difficult task, not least because of limited space to move the large poles and bars that they had been using to tighten up the 2” isolating cock onto the stand pipe base, as it got tighter the stand pipe itself started to move and Phil had to hang onto the pipe wrench with a torque bar on to stop the stand pipe from turning while Jason pushed with the stilsons and another scaff bar in the opposite direction, eventually after much huffing and puffing the valve was tight on the pipe and in the correct orientation, the bits of 2” valve that were taken off were refitted and the deadmans valve re-attached but again another clearance issue was discovered this time with the deadmans valve casing and one of the angle iron brace bars on the outer nose bodywork, a clearance notch will need to be cut out for this but not today... Some undercoat was painted onto the stand pipe assembly and then the curve pipe underneath was also treated to some undercoating, while the paint was out Jason and Phil went into the cab and completed painting of the 2” pipework in the cab with undercoat, by now it was around lunch time so the pair stopped for some refreshment, after lunch Jason & Phil sorted out the bolts for the nose steps that had been removed at a previous work session, to original bolts was a bit ropey so a replacement set was sorted out, these were covered with paint and needed to be drelled up so the two set up a mini production line, Phil drelling the bolts up on the bench grinder and Jason cleaning out the threads with the tap & die set, after a while a full set of nice shiny bolt were ready for the refitting of the steps, when back at the loco the set mounting needed slight adjustment before they would line up, and Jason and Phil re-attached the steps, then they put the nose end door back on that had been removed to improve access to the nose end when doing the stand pipe, to complete the day's activities Phil & Jason both painted one of the buffer beam vac pipes each with the white gloss paint, and so that ended another days efforts on D8233, Phil had to depart early so that left Jason to finish off the battery charging and when they were done he took the last of them down to the workshop container to go with the rest of the batteries, it had been a quiet couple of days but progress had been made none the less. If you wish to lend a hand please contact Chris Tatton |
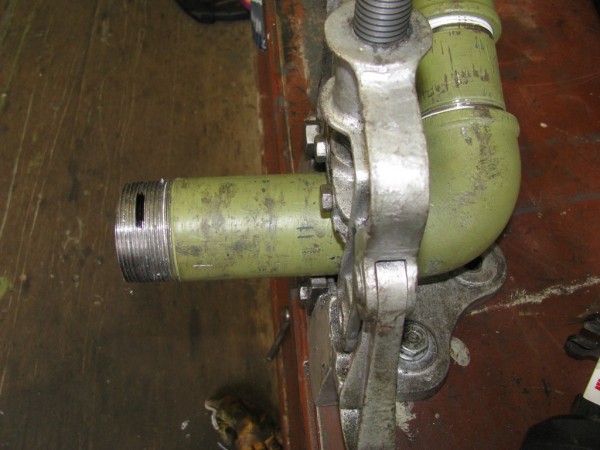 |
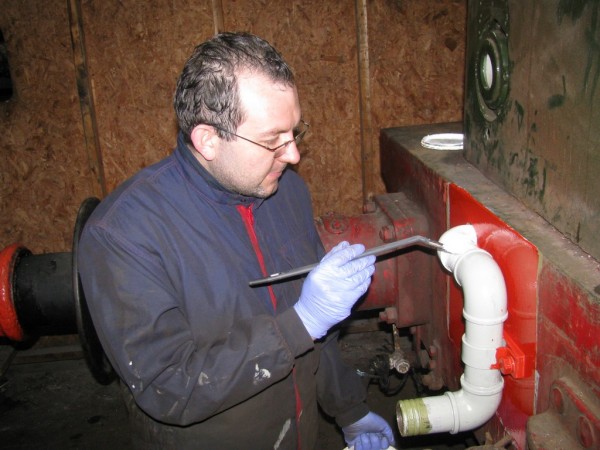
| Above : One of the buffer beam pipes is in the pipe vice marked up for thread trimming. © C15PS |
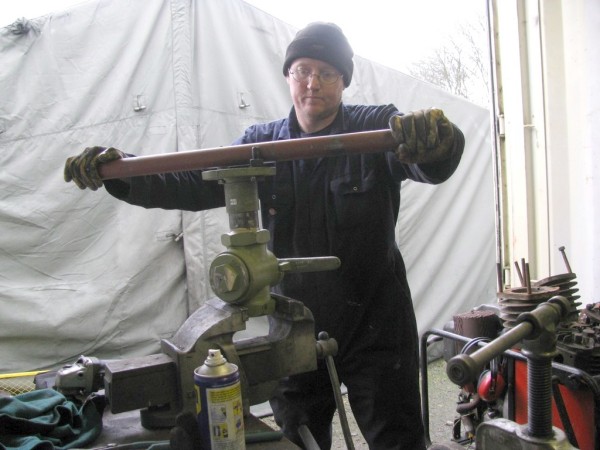 |
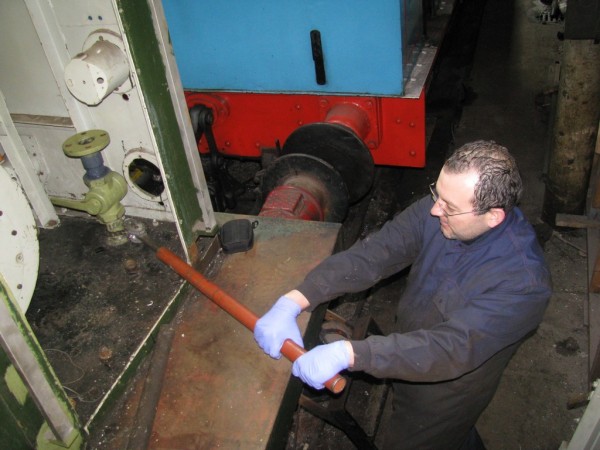
| Above : Jason uses a pole to apply torque to fully tighten the stand pipe top flange. © C15PS |
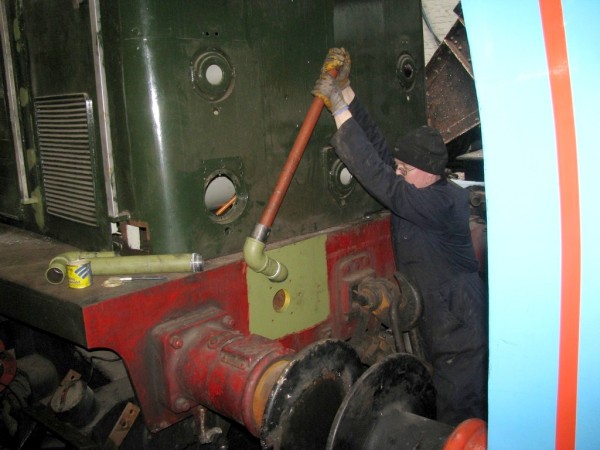 |
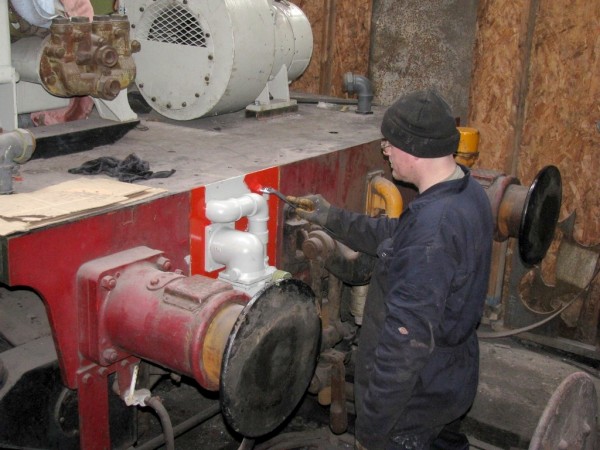
Above :
Using leverage again to screw in the pipe that passes through the buffer beam. © C15PS |
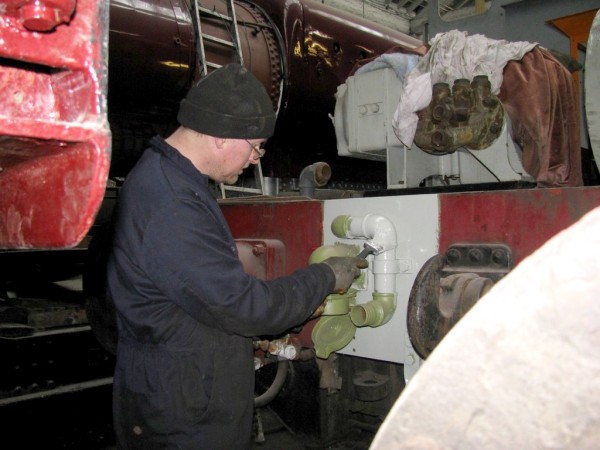 |
Above :
Once the pipe was refitted some undercoat paint was applied to the area. © C15PS |
 |
| Above : Jason applies the red gloss paint to one the buffer beams. © C15PS |
 |
| Above : Phil braces himself to hold the stand pipe steady with the pipe wrench. © C15PS |
 |
| Above : Phil carefully paints the buffer beam pipes with the gloss white paint. © C15PS |
Fancy Getting Involved? click on the You Can Help page