16-17 February 2013
Attendance: 2 Today Jason arrived keen to get the remaining 2” Vacuum pipework on D8233 finished off as he'd not had the opportunity thus far this year to get the job finished off, to begin with Jason was on his own during the first part of the morning so he started by test fitting the under frame curve pipe to check to see where the adjustments needed to be made, one end of the pipe is too long the other too short, so he took the pipe down to the workshop container and dismantled it ready for adjustment, having borrowed the electric pipe threading machine from Buckley Wells shed again he set it up extend the threads on one of the pipes, it was at this time that he received a text message from Phil Cribbin saying he was on his way down, so he went to meet him at the support coach and have a brew before continuing with the work, after the first pipe had been cut to length it was again test fitted onto the loco, the fit was better but still needed further adjustment, thus was the nature of the work today, much tedious fettling to get the curve pipe adjusted to fit correctly, after cutting off a couple of threads the pipe was test fitted again and this time looked to be OK the guys then stopped for lunch. After lunch the next job was to fashion a new cross pipe had to be made up to replace the one that was too short, fortunately there was a piece of pipe already cleaned up and with some quick trimming with the sabre saw soon cut to a appropriate length, each end then needed to be threaded but while using the machine problems were experience with it picking up swarf and damaging the new threads, a short time out back to the coach was taken to dismantle the cutting head and attempt to sharpen the cutters, then the threading continued with some difficulty but eventually it was done, the curve pipe was then reassembled and test fitted again, and again it required some fine adjustment and cutting off some threads to get the length correct, once they were happy with the pipe next job was to get the stand pipe that goes up through the floor into the nose end screwed into the 3-way elbow, now it supposed to be clamped to the floor with a back nut top and bottom, but due to the limited access below the frames it was decided to leave out the under floor back nut, but when the stand pipe was fitted it was found to move up and down in the hole and was insecure so the under floor back nut would have to be fitted, but it was getting late and dark so Jason called time on proceedings and they decided to tackle the job afresh the following day. Sunday 17 th February 2013 Attendance: 2 As in the day before Jason would be on his own for the start of the day, so he used the time to pre-assemble the pipework section for the front buffer beam, that way it would be quicker and easier to assemble the buffer beam pipe when the time came to finally fit it up, so Jason collected the parts and took them to the container, he then screwed the various bits together to form two sub assemblies and tool then to the loco to offer them up to see if they fitted, and it's a good job that he did as one of the pipes was a tad too long and needed trimming down also he noted that the pipe bracket that secures the pipe assembly to the buffer beam has a thick metal spacer block behind the bracket to stand out the pipe a little bit from the buffer beam, Jason would have to make a spacer plate later in the day for this but it was again about that time when he was joined by Phil, after a tea break they went to the loco and began the task of refitting the stand pipe with two back nuts, first the stand pipe was removed and the old PTFE tape cleaned out the threads, then Jason brushed some liquid thread sealant into the threads inside the 3-way elbow under the floor, then with Jason underneath and Phil on top the pipe was carefully lowered through the hole and after the under floor back nut had been started and some more liquid jointing compound smeared on the exposed threads the stand pipe was screwed down into the 3-way elbow using the chain wrench up top, when it was tight the back nuts were adjusted to attain the correct alignment with the buffer beam home then both were fully tightened down clamping the stand pipe firmly to the floor. It was then discovered that the 2” isolating cock would foul the lower R/H marker light bowl when being screwed in, so the marker light bowl was temporarily removed to give better clearance, it was then a good time to stop for some lunch, after which the first section of the buffer beam pipe had to have the length of its cross pipe adjusted before it could be screwed in, this was a close fit through the hole in the buffer beam and as such was very tight to fully screw up, using a combination of long tube, some 36” slisons and some brute force the pipe was slowly wound in until it would go no-more, next the down pipe was screwed on using the chain wrench and when it was all done it aligned with the bracket OK, moving into the nose end the 2” stop cock was test fitted and found to still foul the recessed mounting ring of the marker lamp bowl, as it was just catching on the edge of the large sealing nut, the valve was removed to the coach and clearance chamfers were ground into the corners, when the valve was refitted it just cleared enough so it could be screwed down, next to height of the Deadmans dump valve was bought into question as it comes very close to the upper marker light bowl, so some further trimming of the flange pipe was needed before it would provide just enough clearance to fit in the desired position, the valve was then bolted down with a sealing gasket and the nose end stand pipe assembly was complete. t was getting on in the day and Phil had to depart but Jason remained for a while to get a spacer block for the buffer beam pipe mounting bracket made up, using a handy piece of quarter inch flat bar he had found, once trimmed to length he then drilled in the holes and cleaned up a pair of bolts to suit, but by now it was getting dark and the works was shut up so he was unable to fit it, but there are still a number of small finesse jobs to do on the 2” Vacuum system before it can be Vac tested and that will have to wait for another day, but at least it was mission accomplished for this weekend in getting the 2” pipework fitting finished. If you wish to lend a hand please contact Chris Tatton |
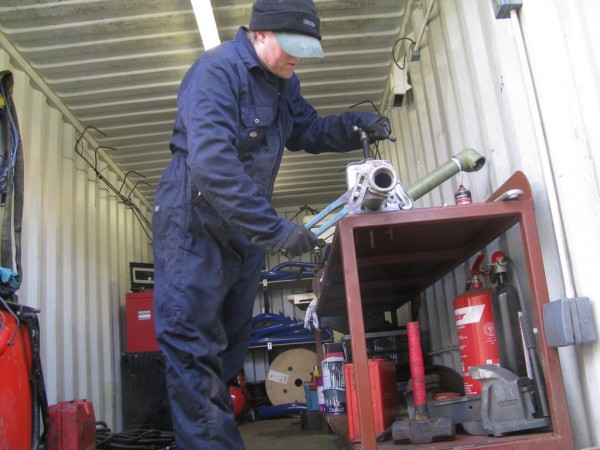 |
| Above : Jason begins dismantling the curve pipe ready for adjusting the threads to the correct length. © C15PS |
 |
| Above : Phil is seen connecting the union joint on the curve pipe during one of the test fittings after adjustment. © C15PS |
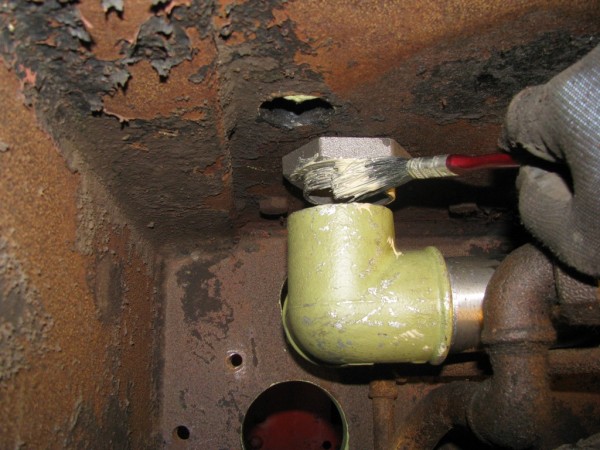 |
Above :
The awkward job of applying the pipe sealant after under floor back nut was fitted is shown here. © C15PS |
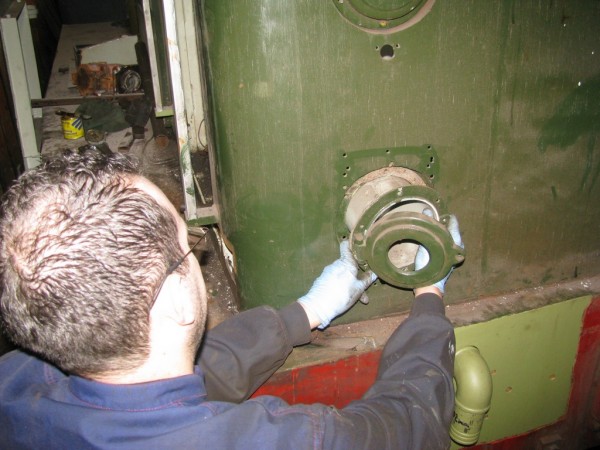 |
Above :
Phil removes the lower R/H marker light bowl after it was found to foul the fitting of the 2" stop cock. © C15PS |
 |
| Above : The front buffer beam pipe has now been fully assembled in position on the loco. © C15PS |
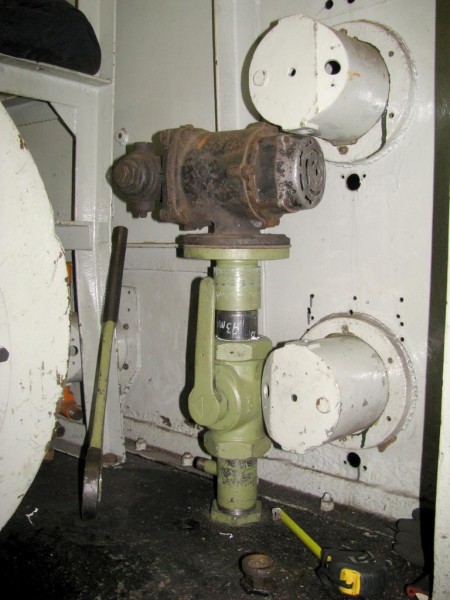 |
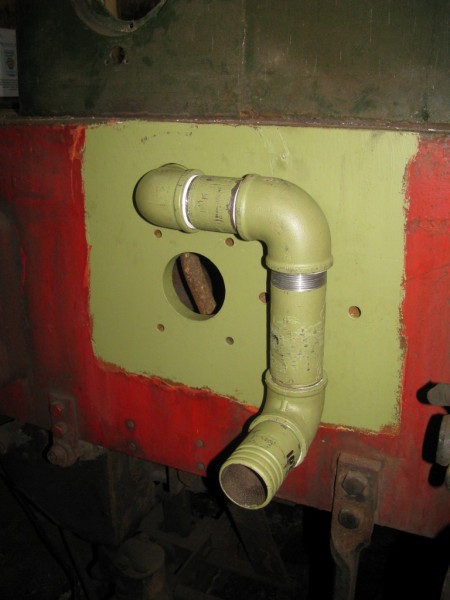
| Above : The now fully fitted nose end stand pipe with 2" Isolating cock & Deadmans emergency application valve. © C15PS |
Fancy Getting Involved? click on the You Can Help page