04 June 2012
Attendance: 1 Following on from the completion of the lengthy overhaul of Class 14 D9531, with the loco now officially re-launched and back in traffic, attention can now turn back to the other locos in our care, Jason who had working solidly on the class 14 for the last 6 months was now keen to get back to working on D8233, but for the last two working weekends he had been helping to strip down the Bo-Bogie off Class 28 D5705 ready for removing the traction motors and lifting the bogie frame off its wheels sets later on this month, but as it was the Jubilee weekend with the Extra Bank Holidays tagged on the back Jason decided to stay up for an extra day and do some work on D8233 to help himself get re-familiarised with working on the BTH Type 1 to which he had become a stranger to whilst working away on Ernest. During the last couple of months there has been some work done on D8233 as a small splinter group of C15PS volunteers have been working on the 15 during the weekends in-between the regular working party weekends, Jim Gough, Dave Garnett and Kris Mason have mostly been undertaking fabrication work on the Traction Motor Blower ducting modifications, Jason on the other hand was given the task earlier in the year to make a start on restoring the Vacuum Brake system on the Loco, but until this work can be started a number of unfinished jobs and preparation tasks need to be completed first and it is some of these jobs that Jason decided to tackle today, being on his own he was limited to what he could actually achieve but with his own list of jobs that needed doing before starting the Vac system he could pick and choose the most suitable task to tackle and having a good understanding of the nature of the jobs required on the loco helped him in making this decision. So first things first, When D8233 was first started up back in June 2010 a small a couple of small oil leaks were found on the lubrication system, but up until now no one could find the time to fix them, Jason was well aware of the leaks and now had the equipment he needed to do something about them, firstly in the cooler group there had been a rather persistent leak that had spilled oil all over the floor and it had seeped under the bulkhead frames and into the front part of the engine compartment, Jason had suspected that the source of the leek was on top of the “Ted” valve, that is the thermostatically controlled valve that regulates the flow of oil through the Oil cooler section of the radiators, its tucked away on the floor behind the TMB ducting that curves around the back of the Stand for the Fan drive gearbox, on top it has a small adjusting screw and when Jason checked it, he found it to be loose, he had bought some copper washers to fit under the lock nut to seal it but there is a locking tab that slots into a recess in the top of the valve body and you cannot use a washer with it, so Jason cleaned off the residual oil and refitted the lock nut and tab making sure this time that it was tightened down fully, He did notice that one of the Oil pipe drain connection appeared to have also been leaking but as it was a large ermeto nut and access was limited he could not find a suitable spanner to fit it so that would have to be nipped up another day. Next it was onto sorting out the other major oil leak, this is union nut on a small pipe that attaches to the main high pressure oil feed pipe from the sump pumps in the front to the back of the block on the Left hand side where it goes in to feed oil to all the main bearing on the crank shaft and cam shafts, the small pipe is in fact the feed to the oil pressure gauge, when we started up the engine this union leaked profusely due to the olive joint being damaged and no new olive of the right size available to replace it, but this time Jason had a hand full of olives and set about sealing the union, but first the old pipe end had to be cut off, he then found that the pipe wasn't quite long enough to reach anymore, but on tracing the pipe back to were the oil pressure gauge had been he found some slack in the pipe and upon pulling some of this excess through and rerouting the pipe along the side of the engine he was able to get enough spare length in the pipe to bend it around and reattach it properly and tightly with the new olive, hopefully that will have cure those two oil leaks J Next task was to give the generator a second coat of wood pigeon gloss, last time Jason and Adam had gloss painted the generator it was using a faulty tin of paint that was contaminated with an oily residue that would not mix in with the paint, when the gloss was painted on the oily residue caused grey runs and spoiled the overall finish of the paint job, now Jason had a fresh tin of paint and this stuff was OK, he then glossed over the drums of the Main & auxiliary generators, having first wiped off the accumulated dust with a rag and some white spirits, once that was done Jason got the Electrical Orange gloss paint and painted the Terminal box and flexible conduit on the side of the exciter, around this time Jason stopped to have a bit of lunch. After Lunch Jason set about removing the Exhauster pannier boxes, these had been temporarily attached with two bolts each as a way of storing and securing them to the loco, but in order to make way for refitting the Vacuum pipework to the Exhausters they would need to be removed so Jason undone the securing bolts and moved the panniers out of the way, the Left hand Pannier he carried to the back of the loco and stowed it around the Air Compressor at the No2 end, with the Right Hand Pannier he simply pulled it down along the sole bar alongside the engine bay, once the panniers had been removed Jason could begin his main task of undercoating the Cab bulkhead in the generator compartment, this bulkhead will need to be gloss painted before the Vacuum pipe work is restored as much of the pipework between the exhausters is mounted onto the Cab bulkhead, The outside of the cab is still in the light grey primer that was sprayed on by the shot blasters, but before the gloss can be applied the cark grey undercoat must go down first, so Jason painted the bulkhead behind both exhausters and the generator, after that had been done he went up onto the roof and undercoated the raised part of the Cab bulkhead over the roof casing where the sealing strip attaches. After this Jason set about digging out some short sections of conduit so that in a fortnights when he is next working on the 15 he can complete the unfinished task of refitting the main electrical conduits through the engine room & cooler group that he and Adam started back in January but for now Jason was satisfied that he had crossed off a few of the jobs on his to-do list. The next working weekend is July 14/15- If you wish to lend a hand please contact Chris Tatton
|
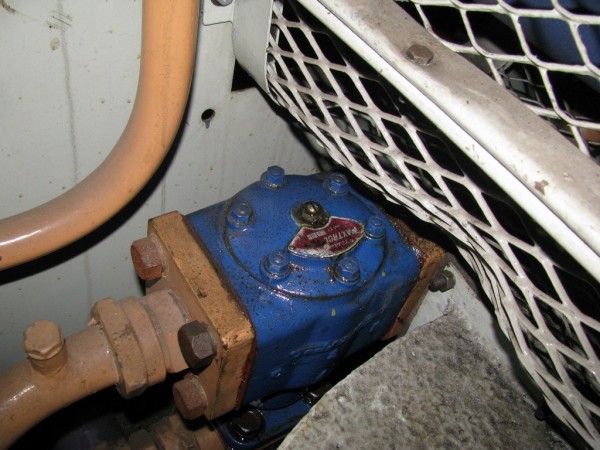 |
| Above : This is the “Tedd” valve and as can be seen it's covered in oil from the leaking screw on top© C15PS |
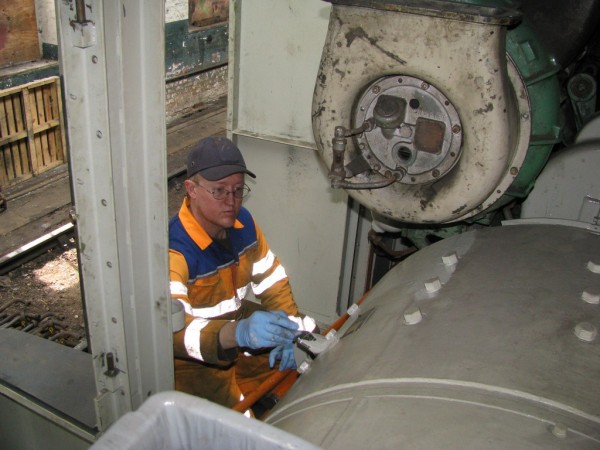 |
| Above : Jason begins to apply the second coat of gloss paint to the generator. © C15PS |
 |
Above :
The Generator is now fully painted into a colour that matches the rest of the loco compartment interior. © C15PS |
 |
Above : The terminal box on the side of the Exciter has now been picked out in electrical orange.© C15PS |
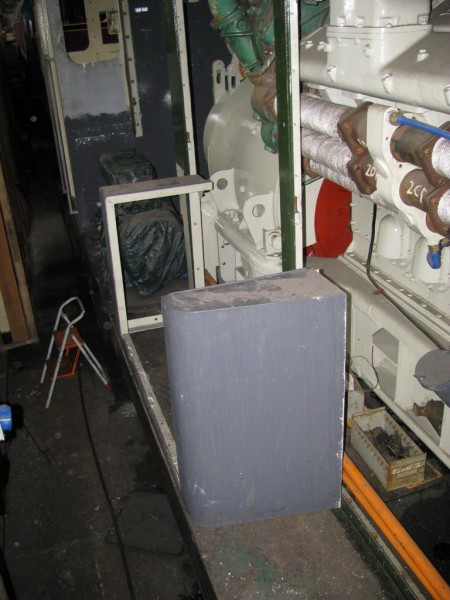 |
| Above : The Exhauster Panniers were removed to allow better access to the bulkhead for painting. © C15PS |
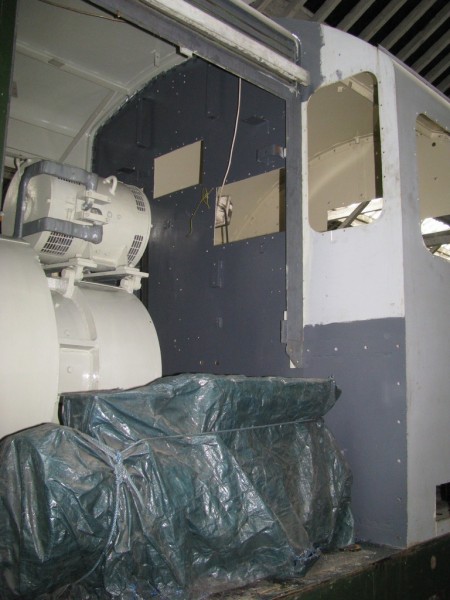 |
| Above : The Cab bulkhead has now been fully painted in dark grey undercoat. © C15PS |
Fancy Getting Involved? click on the You Can Help page