5 - 6 June 2010
Saturday 5 th June Attendance: 3 With the final push to get all the outstanding jobs on D8233 engine completed before the start-up attempt in a fortnight's time, Jason had written down all the tasks that needed doing, Jim & Kris had arrived with a load of goodies, one being a replacement Fuel priming pump and accessories for the welder, while they were setting up the welder Jim decided that it needed a longer plug lead, a suitable length of Heavy Duty 32A flex was found nearby and both he & Kris set about swapping it out this required the removal of the covers to the welder and after it was done they also decided to replace the earth lead with a much thicker one that Jim had bought down previously so this necessitated the removal of the cover on the other side and this TLC for the welder took up most of the morning. Meanwhile Jason had been looking at his job list and setting to it, but on arriving at the loco he found that the power lead used to the supply the loco had been removed, he soon found it attached to the Ex-Lizzy coach, but as we had “Borrowed” it from that in the first place Jason decided to break out the spare 25M power supply lead a duly fitted it to the loco to restore power, around this time Les Tappenden turned up and dropped off the new stainless steel locking tabs for the generator flywheel, these will be fitted later on but were Grateful to Les for all his help of late, Jason retuned to the loco and set about fitting the pipe olive to the oil pressure gauge pipe, unfortunately he encountered a problem in that the metric olive he had bought was just a tad too small for the pipe so Jason had to file it down a little until it fitted, however it still seemed to be dripping a little and would need checking again later on, The next task for the fit the washer & split pin to the Governor control arm linkage, Jason found that he needed to drill out the hole to take a bigger split pin and this meant that a groove had to be ground into the washer to accommodate the thicker split pin, also in this general area of the engine is the Tacho Generator, this was wired into a Rev counter on the makeshift engine control panel, but it had been disconnected and the wiring loom moved out the way during the painting of the engine, so Jason now sought to put it back, he rewired the Tacho generator and traced the wired back to the Rev counted to make sure they were ok, this task was soon accomplished and onto the next. Jim & Kris had by now completed there repairs on the welder and were now setting the exhaust ports up for welding, the new guard meshes had not been trimmed properly so Jim needed a way to cut off the wire tails, Jason suggested using the side cutters and demonstrated by chopping one off, the off cut went ping and shot off into the workshop, so Jim cut the rest off and had fun making them shoot off in all directions, soon the mesh was ready for welding and with the new cables and a full fat power supply the welder breezed though the task, it was noticed that the corners were starting to crack, Jim asked Jason advice and he suggested they weld up all the cornets and grind off any high spots, so Jim did the welding and Kris finished the job off by grinding smooth the corner welds. With the welding complete both the exhaust ports were taken outside and Jim spray painted them with some special high-temperature exhaust paint, they needed a couple of coats but this will help to protect them from resting when fitted back onto the roof of the loco. Jason meanwhile had been sorting out the wiring for the engine governor stop solenoid, these he carefully traced until he found the two wire responsible, he pulled them out and cut the ends off and bared them clean before taping them to a bit of card marked up to say what they were, it was now time to start the task of refitting the fuel priming pump, Jason began by removing the old one and Jim bought down the new one, it soon became apparent that although the general dimensions of the new pump were right the flanges were not compatible with the old pump so the old pump had to be removed completely and the new pump installed by swapping over the mounting flanges, however it soon became apparent that something was wrong the alignment of the upper pipe flange was all wrong, it kept going crooked and leaked when the pump was tested, it was soon found that the pipe threads were sticking through so the pipe was removed and the threads trimmed, Jason made some new gaskets and the pipe was refitted, it was tested and sorta seemed to be pumping so we left it at that and moved onto other tasks. Jim & Kris now began the task of refitting and tightening down the engine mountings, as the L/H/F one was loose they chose to do that one first, the pin needed to be thoroughly drelled and they found that the split pins they had that fitted the holes weren't long enough, so they decided to drill out the holes to accept a bigger & longer split pin, this they did using the bench drill, when they returned Jason had to assist then and show climb inside the bogie to hold the large spanner on the bottom of the bolt while they tightened it up on top, with that done they moved onto the next mounting but Jason had other plans, As the L/H side of the engine was painted, the rockers had been removed for painting and the original gaskets broke apart upon removal, so new gaskets had been located in the store and bought down for fitting, so Jason removed all the rocker covers one at a time, he then took a gasket, smeared it with gasket sealant and fitted it to the engine he then carefully placed the rocket cover over and tightened it down evenly so as not the dislodge the new gasket, with one down there were still seven more to go… When Jim & Kris came to the L/H/R engine mounting they hit upon a snag, the battery box & fuel tanks are mounted directly below the mount and to get at the bolt they had to remove the two piece battery door and squeeze into the gap above the battery box frame in order to get at the bolt, once removed they took it back to the coach as before, drelled & drilled the split-pin hole out then returned to fit the bolt, by the time they were ready to tackle the R/H engine mounts Jason had finished fitting the Rocket gaskets and came over to give them a hand, the R/H/R mounting was a real pig to get to, for one thing the catches on the battery box door were seized and only after some brute force was applied did it come off, then inside the battery box was the assembly for the battery isolation switch and shore supply connection & switch panel and these were in the way, fortunately Lil'Kris was small enough to squeeze in and hold the bolt while it was undone, While Kris went to the coach to clean up the bolt Jason and Jim had a look at the seized coach lock on the battery box door, it was very still so a liberal amount of WD40 was sprayed around and into the lock mechanism, then Jason suggested that they heat it up, so the blow-torch was used on it to try and burn away the crud, but that just served to seize it up completely, when some more WD40 was sprayed on to help cool it down again, some fire flared up as there had been a small flicker inside the lock, but eventually the lock began to move again and after Kris & Jim had refitted & tightened the engine mount they refitted the battery box door. The final engine mounting was dealt with quickly and by that time both Jim & Kris had to depart early, so they packed up what they were doing and bade their farewells while Jason went back to finish off a few jobs, one was to gloss paint the R/H side of the generator cradle frame, it had been partially painted before when the genny was fitted, but now he had more time he decided to finish it off, when that was done it was time to start packing things away, the trap had been pulled up the side of the loco and this was now pulled back down and the tarp fully secured, I final job for the day was for Jason to go into the Class 14 stores in Paddys engine room and locate two coils of heavy duty traction motor cables, these he carried up to the coach amd placed in secure storage as these will be used to jump-start D8233 generator from another loco at the start-up. It had been one of those days where a lot got done, even if a lot of the jobs were small trivial 10 min tasks, they were nether the less equally important to successful running of the engine in a fortnights time. Sunday 6 th Attendance: 2 With the majority of the main task on Jason job list completed the day before, today would be a coasting session, Jason was joined by Dave Garnett but he would be mostly continuing his battening task in the cab of the Co-bo, the first task of the day would be to grease up all the greasing points on Fan drive mechanism, we had recently acquired an air powered grease gun for this task so Jason took down the compressor and an air line and started in the cooler group where there are two grease nipples on storks that feed the main fan bearing up above, Jason found it tight getting into position to fit the grease gun onto the nipple but when he did he applied about half a dozen pumps to each, that done the cooler group was locked and he moved to the front of the engine, the Fan drive clutch has a grease nipple on it too but it was covered with paint and Jason had to go and fetch a battery drill with a small wire wheel attachment and clean the surface of the nipple off before he could apply the grease. With that done Jason looked around at the floor area just in front of the engine and it was in a right state, there has been a small oil leak somewhere around the front of the engine and now that the fuel system has been primed the fuel filters have been dripping diesel on the floor, so Jason decided to have a good clean up in this are to see if he could figure out where all the leaks were coming from, so he got a load of old rags and started mopping up, mean while Dave had come down to see what was occurring and noticed that the rectangular hole in the floor (where the Traction motor blower ducting should go) needed a plate over it to prevent anything being lost down it or even worse someone putting their foot through it, so he got a tape measure, took some measurements and went away, shortly he returned with a piece of wood that pushed into the hole and there is a slight lip around the edge that it rests on and it stays put, after cleaning up Jason decided to place some folded rags under the places where he thought the leaking was coming from, he then got the floor paint and went around the area again this tidied the floor up no end and hopefully now that all the drelling in this are is done it will stay that way, While he had the black paint out he went to the back of the generator and painted the square of floor directly beneath the buzz bars. It was time for lunch so Jason & Dave stopped for some food, afterwards Jason drove his car up to Castlecroft yard where he asked Matt Hainsworth where he could get some engine oil as he needed a bit to top up the turbo bearings and the fuel pump cam box oil supply, Matt sorted him out with couple of 4 pint plastic milk bottles and he went back down to Baron St, first he checked the oil levels on the turbos, both the levels on the L/H turbo were OK but the R/H rear bearing was low, this was due to a loose pipe and the fact that when the turbo was recently removed and placed on the floor during the genny re-fitting the pipe had leaked oil on the floor, so Jason tightened up the pipe unions and removed the filler and began to pour in the oil, it actually took quite a bit before the level was correct, and with that done Jason turned to the Fuel pump cam box. Topping this up would be tricky as the filler caps were only small and we didn't have a funnel small enough to fit, so Dave suggested cutting open a plastic milk bottle and using the handle as a fine funnel, Jason did this and it worked after a fashion, however as the oil was so clean it was difficult to read the level on the dip stick so he filled it as much as he dared and left it at that, The final task for the day was to find and fit to drain pipes for the Turbos, these he had to fetch from the old engine back down the bottom of the yard behind the Co-bo tent, once he had them they needed to be bent into shape and getting at the union nut to bolt them up was really awkward as the connection was right above the main mounting bracket for the turbo and only a small amount of spanner travel was available to tighten it up, still in the end the job was done and Jason could finally tidy up and secure the tarp. Just about all the jobs that had been on his list were completed and the engine is nearly ready to go, just 14 days to go before we find out exactly what a Paxman 16YHXL sounds like :) The next working weekend is 3/4 July. If you wish to lend a hand please contact Chris Tatton |
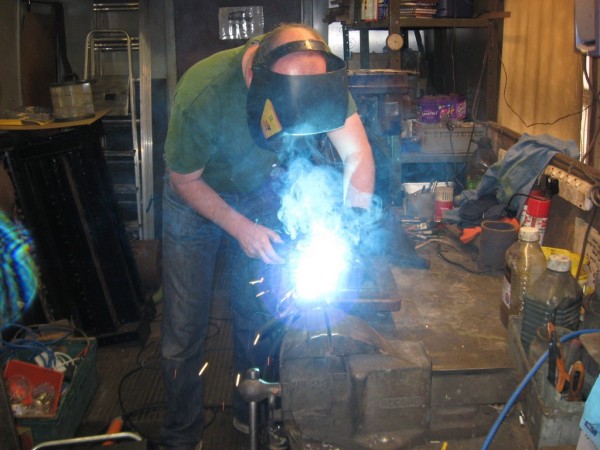 |
| Above : Jim welds the heavy wire mesh onto the top of one of the Exhaust ports. © C15PS |
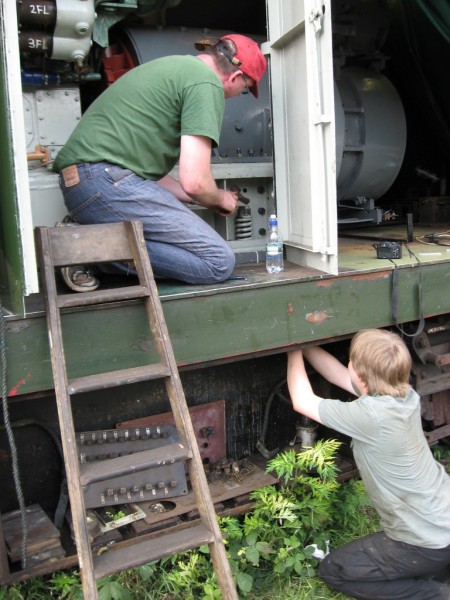 |
| Above : Jim & Kris work together to remove the L/H/R engine mounting bolt. © C15PS |
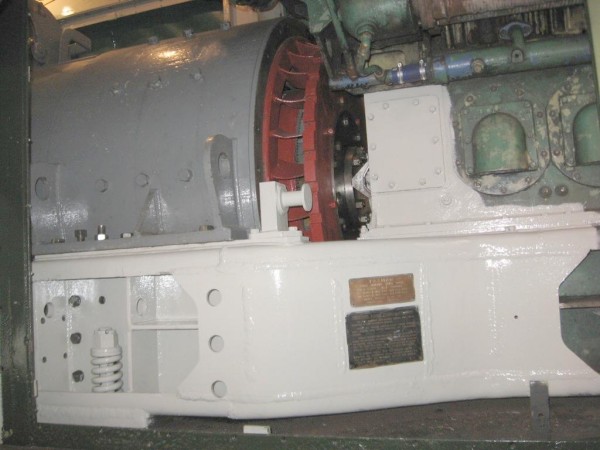 |
| Above : Painting of the R/H side of the genny bed frame has now been completed. © C15PS |
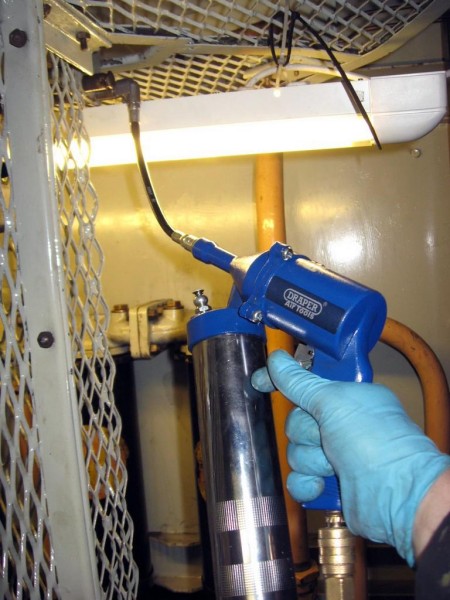 |
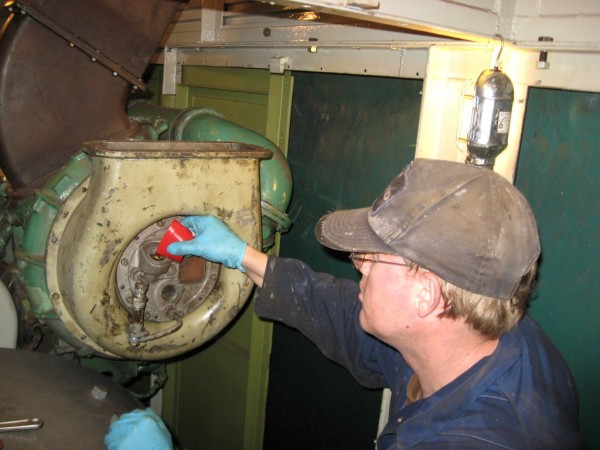
Above : Jason uses the air grease gun to pump grease into the fan bearing. © C15PS |
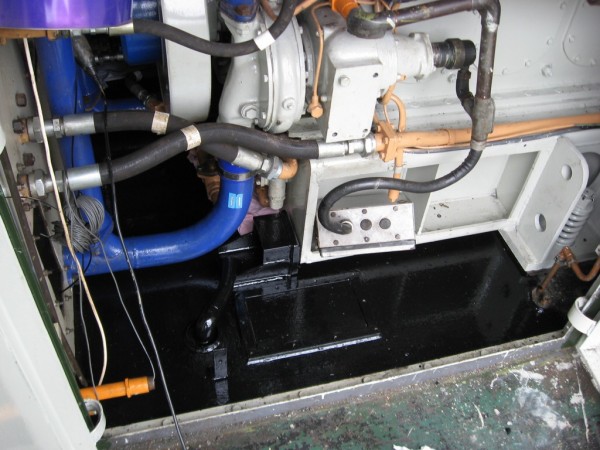 |
Above :
After cleaning the front engine floor area was given another lick of paint.© C15PS |
 |
| Above : Jason tops up the oil level on the R/H rear turbo bearing oil bath. © C15PS |
Fancy Getting Involved? click on the You Can Help page