13 – 14 February 2010
Saturday 14th February Attendance: 2 With the cab lift now only a month away the main task for this weekend was to get the remaining cab fittings removed, get the rest of the bolts removed that attach it to the floor and bodywork frames through either bulkhead and then detach the fixings on the B end body sections and try to cut through or grind away the seam welds made during a previous cosmetic body repair when the loco was at Mangapps Farm railway museum in the late 80s to mid 90's. Jason arrived first thing and was soon joined by Jim who had bought with him the first of the Exhauster panniers that he has been doing metal work repairs on, this was loaded up in the back of his dad's car so after a cuppa they unloaded the pannier and placed it on the outside work bench, the pannier had arrived in bare metal as it had previously been shot blasted and all the welding repairs were made with fresh steel plate, so now that it was back we would need to slap on some green primer paint to protect the clean metal and prevent it going rusty, but before that it was decided to try and test fit one of the pannier doors to see if it would still fit, this required the tarp to be pulled back over the cab of the loco, a job that we would have done anyway as we later would be need the trap back so as to access the seam welds on the B end pannier tops, once the tarp was back over the cab Jason & Jim had to manhandle the large pannier doors down for their resting place in the genny compartment onto the floor, now as the doors were not marked up they pulled out the one they needed, but after lugging it down to the bench it was found that it was the wrong door, the pannier Jim had bought with him was the R/H one and the door we got down was for the L/H so we had to go back and get the other one down. Fitting the doors proved troublesome to say the least; the hinges have obviously had a few knocks since the doors were first removed from the loco back in early 2006 and have been put out of alignment, at first they tried to fit the door horizontally with the pannier on the work bench but this method was awkward and not really working, so Jim suggested that the pannier be stood on its end and the door fitted vertically, so this was tried and eventually with a bit of cussing and a lot of hammering the door eventually slotted into its hinges, however when the pannier was placed flat on the ground the edge of the door frame was well out of true, the gaps were ok at the bottom but the door overlapped but by some margin at the top. At first this led to much head scratching as the door was original and unmodified, had Jim got his measurements wrong when he rebuilt the pannier?? However the real reason for this problem soon dawned on them and after measuring the side frame for parallel-ness it was found that the distance between the side frames was considerably less at the top, and the gap at the bottom was correct for the width of the door, so what had happened? Jim had stood the Pannier up on its end while we welded it and due to the weight and heat warp from welder it had bent in on itself so that the end cases were actually leaning in on each other, when the pannier is bolted back down to the loco it should right itself, if not then we have the jacking bar to push the frames apart to the correct distance before fitting, so it's a minor inconvenience. After this excitement the door was removed and put back on the loco and then Jase & Jim slapped on the green primer and left the pannier to dry on the bench. The next task and main focus of the days efforts was to get the seam welds between the pannier tops on the B end and the cab bulkhead ground & cut away so that the B end body sections could be separated from the cab, Jim had bought back the Plasma cutter to use for this task but as has happened before, getting it to work satisfactory was a matter of time consuming trial and error - at first it did not want to cut at all and Jim tried in vain to get it to start, even when it did it soon cut out again and after a while it was decided that the air pressure was set way too high so Jason adjusted it and managed to get the cutter working a little better. The main problem with using a plasma cutter is that its designed to cut right through metal and does not work terribly well at digging into metal, the force of the flame blows the molten metal through, but we were just cutting the welds away and the molten metal was just blowing back and clogging the bit, Jim had to constantly change the tips and shields on the cutter to keep it clean and make sure the electrical contact was good. Eventually Jim gave up and Jason took over he moved over the R/H side of the cab (Jim had been working away on the L/H seam weld) Jason discovered that the cutter could be used to blow out the welds if it was used in a sweeping motion rather than just running a straight line, this gave the molten metal somewhere to be blown out of the way and some progress was made but even then it was not as good as expected, with this new method of work Jim decided to have another go while Jason set about unbolting the B end from the cab it was around this time that we were paid a visit by an old acquaintance, Mr Dave Shell who had been a volunteer on D8233 way back in 2006 when the loco first arrived back at Bury, however he's got other railway projects he's involved with these days but as he was down on the ELR for D9016 Gordon Highlanders last running day for a while he decided to pop in and have a look at what we were doing before he set off for home which was nice of him. Time was moving on and we had not as yet managed to cut through the welds, but we had significantly weakened them and the next plan is to get some heavy duty grinding disks and grind away at the remains of the welds until they are thin enough to break off when the body section is lifted, Jim had to depart so they packed everything away and pulled the tarp back over the loco, but not before the pannier was lifted off the bench (now that the paint was dry) and placed on the L/H side sole bar just in front of the cab. Overall then it did not seem like we got a whole lot done or much to show for our efforts but cutting through these welds was no picnic and hopefully enough damage has been done to them to make them snap off when the body section is craned off in a months time so as always progress was made and the restoration moves forward. Sunday 14th February Jason would be on his own for today but he had another specific task to perform that is finish up in the cab, removing the last of the battening from the sides, ceiling and front bulkhead and taking out the last of the electrical conduit, but first things first - all the battens had to be clearly marked with black marker pen, then all the necessary reference photos were taken of the battens and conduits before anything was removed, that done Jason entered the Genny compartment and began removing the bulkhead bolts that attach the ends of the side frames to the cab, some of these bolts were a bit sticky so Jason used the blow torch to heat up the captive nuts and this made removing most of the bolts easier though there were still a few that sheared off, that done it was time to remove the front bulkhead battens. The genny compartment side of the cab bulkhead had already been drelled and painted three quarters of the way down, this nice fresh paint would now have to be ruined in order to drell the paint off the heads of the screws that pass through the bulkhead from this side into the battens on the inside of the cab and hold them in place, its shame to spoil this nice paintwork but as the cab is getting fully shot blasted its was coming back off anyway so its no big deal really. Jason drelled all the screw head off and then had the un-enviable task of removing the screw mostly using the impact driver as with the ones on the other cab bulkhead before, when this was done he could move back into the cab. The next place to start was the roof and Jason soon discovered a quick trick to removing the ceiling battens; as most are bolted on and the old bolts are small seized and covered with paint he found that using the angle grinder to grind the nuts away was a much quicker method of taking the bolts out, the old bolts were shot and need replacing anyway so it's a worthwhile short cut, with the battens removed he had to also take out the lighting conduit, this is quite large and bows right across the roof from one side to the other where it attaches to the boxes that house the marker light switches, these were bolted on and duly removed, there was another conduit that passed though the front bulkhead, and ran down to the floor this was tricky to remove due to its shape and had to dismantled into pieces before it could be taken off, all the remaining battening that was fitted to the side walls had been removed earlier in the day and all the battens and conduit was piled in a heap in the No1 end driving position, so Jason picked all up and neatly placed the stuff in the cubical space, after that he had to go into the genny compartment and primer paint the floor flange on the R/H Exhauster Pannier (which was facing upwards) as it was resting upside down on the L/H sold bar, after that everything was done and the cab is now fully stripped, the only thing left inside is the aftermarket cab door from the L/H side which is being retained for now just in case we need it again, but other than that it was a case of Mission Accomplished for Jason as he had successfully completed his allotted task for the day, all that remains now is to remove the final floor bolts on the cab, take out all the floor bolts on the B end body section and break those welds and then the Cab & B end will be free and ready for lifting off. The next working weekend is 3/4/ April. If you wish to lend a hand please contact Chris Tatton |
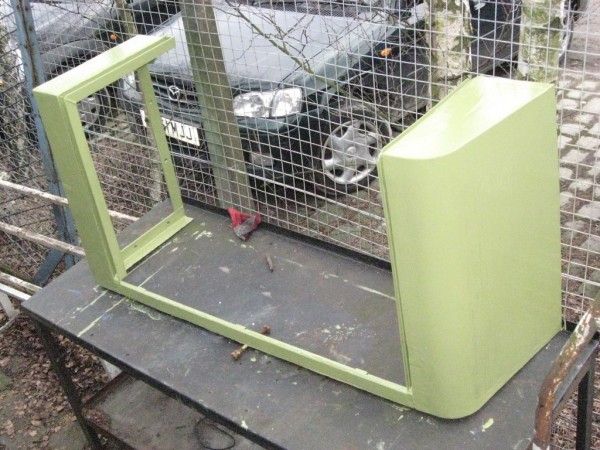 |
| Above : The first Pannier is back from welding repair and was painted with primer. © C15PS |
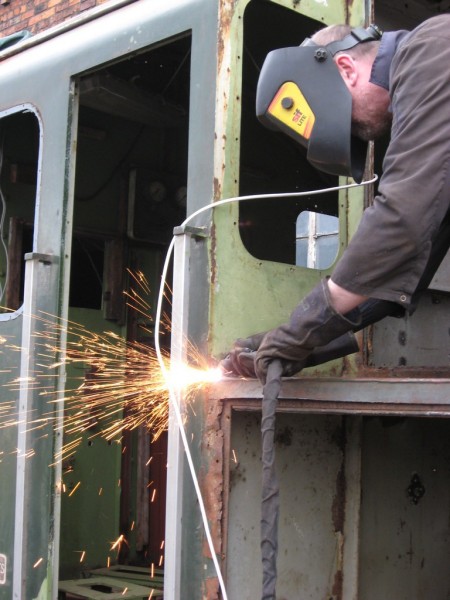 |
| Above : Jim Makes a start at Plasma cutting through the L/H seam weld. © C15PS |
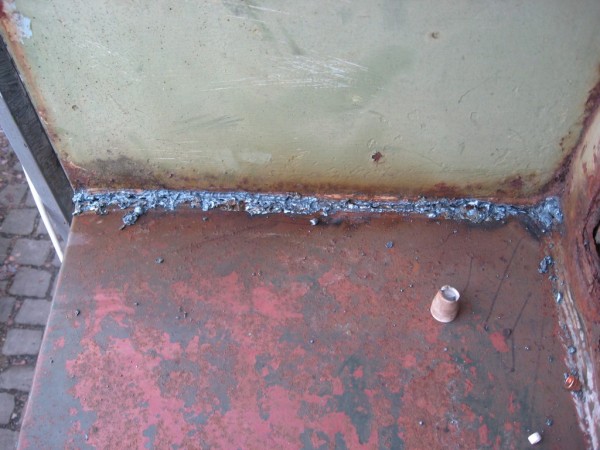 |
| Above : The molten metal from the Plasma cutter had nowhere to go to. © C15PS |
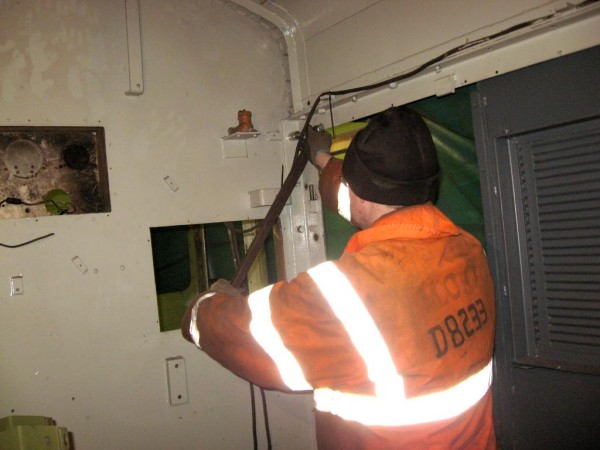 |
Above : Jason unbolts the L/H side frame from the front cab bulkhead. © C15PS |
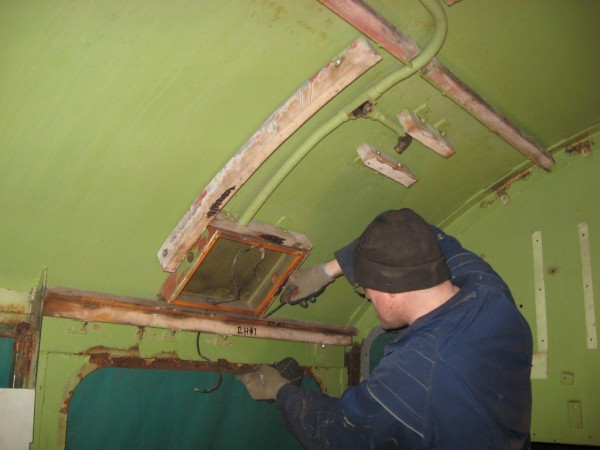 |
Above :
Here he is seen unbolting one of the battens round the light switch box.
© C15PS |
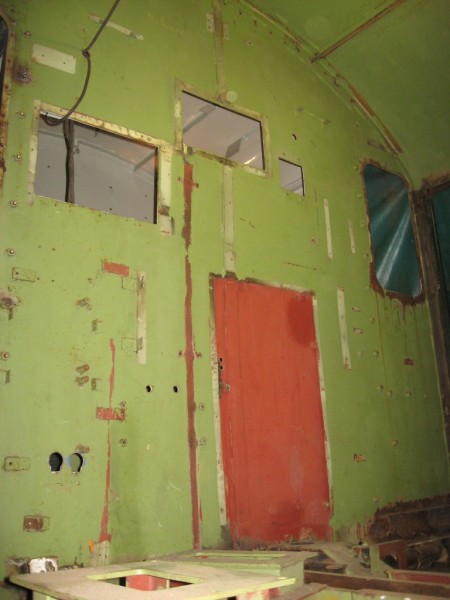 |
Above :
The front cab bulkhead is now fully stripped as is the rest of the cab.© C15PS |
Fancy Getting Involved? click on the You Can Help page